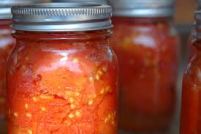
 For the self-reliant out there, few skills are more useful than the ability to preserve the food one has grown. Canning is the process of storing processed foods, homegrown vegetables, meats, sauces, stocks and many other food products that are then preserved during the lean months for consumption when not much that is fresh food is available.
It is a bit of a labor-intensive process, but it is also easy to grasp. All you need is some basic equipment: a canning pot, some jars, sealing lids and rings, and maybe some friends to help you process your food. What you’re left with, homemade jams, jellies, pickles and a wide array of other products make great gifts or trade-able goods (if you have friends and neighbors who also can their food or make some other sort of desirable good).
If you’re planning on relying a bit more on canned goods throughout the winter, you will be very thankful you put in the work. Like the industrious ant who built his reserves for the winter, you’ll take the opulent gifts of summer and live on them over the winter. (You might even help some of your more “grasshopper-like” friends.)
So what do you need to get started? What are the basic principles of canning? Well, let’s find out, shall we?
Basics
Home canning is a simple process that’s been used for a long time in its current form. After preparing the food you wish to can, you’re ensuring that microbial life won’t take hold and spoil the food (by the process of upping the acidity of the food or, in the case of pickling, cooking the food and submerging it in a brine, which is an inhospitable climate for bacetria and other pathogens).
After doing this, you start water boiling in a large pot (usually with a wire rack on the inside), and submerge the jars, sterilizing them. (Some canning forceps that will hold the jars work well for this purpose). You take the jars out and put the food in the jars, then apply a sealing lid and a metal ring to hold it in place. The full jars are then submerged again, the lids seal on the mouth of the jars and then you bring them out of the pot and set them to cool, removing the rings. The canned food is ready to store at this point, preferably in a dark place that’s neither too hot nor too cold.
What you’ve done in this process is do your best to kill harmful pathogens. By cooking the food and preparing it in such a way to lessen the chances of the microbial life flourishing again and then, when we submerge the jars and place them in the pot to seal, we’re sterilizing the contents further.
So keeping your canning operation clean and orderly is of utmost importance. You want to make sure everything is clean and that you are diligent in making sure that everything is sterilized. If not, there is a chance that Clostridium botulinum, a bacterium which causes botulism, an incredible sickness that can kill, may take hold in your food. Although this is rare, it is a possibility, so, please keep clean.
Necessary Materials
- Canning pot
- Mason jars, whichever size is most appropriate to your project
- Sealing lids that fit the mouths of your jars
- Rings to secure the unsealed lids in the canning pot
- Canning forceps (for handling hot jars in boiling water)

